Module 0, Install GeoDMS GUI and setup a configuration


learning objective: install the GeoDMS, open your first configuration file, and set up your text editor
introduction
Before you can start modelling, you need two things working on your machine: the GeoDMS GUI and a text editor configured to work with it. This module walks you through both.
A quick note on how the GeoDMS works: your model lives in one or more plain text files with the extension .dms. These are called configuration files. The GeoDMS GUI reads these files, builds a tree of all the items defined in them, and lets you inspect and calculate results. You edit configuration files in a text editor; you view results in the GUI. You will constantly switch between the two.
step 1: install the GeoDMS
- Go to the GeoDMS releases page and download the most recent stable release.
- Run the installer and follow the steps up to and including Part I of the Installation Instructions.
step 2: load and open your first configuration
All exercises in this Academy are bundled in a single project. Download it once now and use it throughout all modules.
- Download the Academy project here
- Unzip it to a folder on your machine, for example
C:/prj/GeoDMSAcademy. This folder is your ProjDir (project directory). - Inside, each exercise has its own subfolder. The root configuration file for this first exercise is
basics_my_first_geodms_project/cfg/basics_my_first_geodms_project.dms.
Now open the configuration in the GeoDMS GUI:
- Start the GeoDMS GUI (installed in the previous step).
- Go to File > Open Configuration and navigate to
basics_my_first_geodms_project.dms. - In the tree view on the left, find and click the item
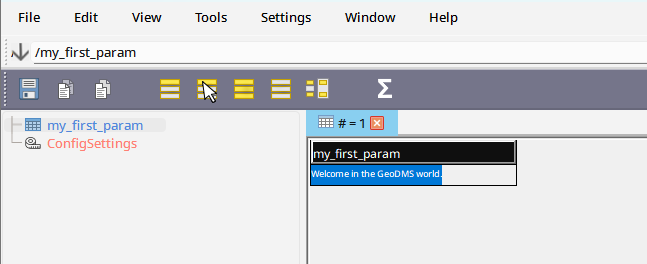
my_first_param. Double-click it to open it in a table view. - If the text is cut off, drag the right edge of the column header to widen it.
Your screen should now look like this:
step 3: configure your text editor
The GeoDMS GUI and a text editor work hand in hand. From the GUI, you can jump directly to the line in the configuration file that defines any selected item. To set this up:
Install Notepad++
We recommend Notepad++ as your editor. It is free, fast, and has GeoDMS syntax highlighting support.
After installing Notepad++, import the GeoDMS language file for syntax highlighting. The language file is installed together with the GeoDMS software and can be found in:
%ProgramFiles%/ObjectVision/GeoDms<version>/
For instructions on importing it, see Setup GeoDMS language file in Notepad++.
Link the editor to the GUI
In the GeoDMS GUI, go to Settings > Local machine Options and look at the Configuration File Editor section:
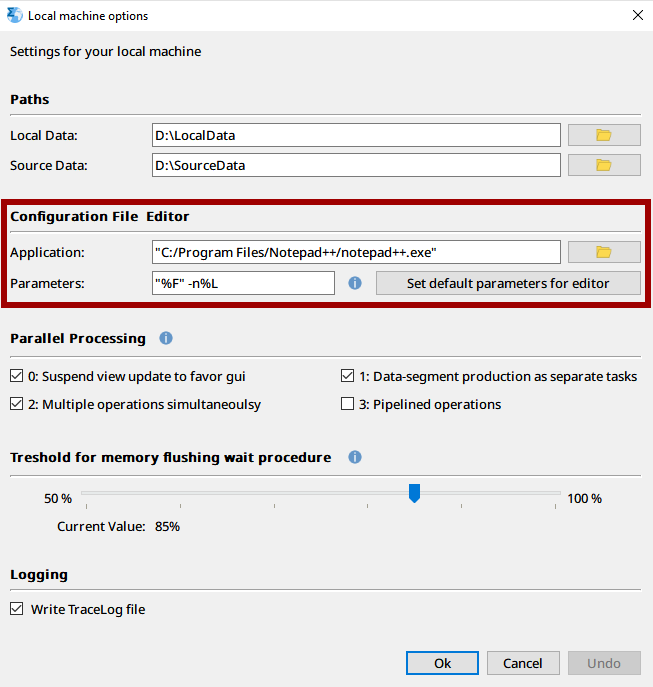
- Use the folder button to select your Notepad++ executable, for example
C:/Program Files/Notepad++/Notepad++.exe. - Click Set default parameters for editor to automatically fill in the correct launch parameters (
"%F" -n%Lfor Notepad++).
Test the editor integration
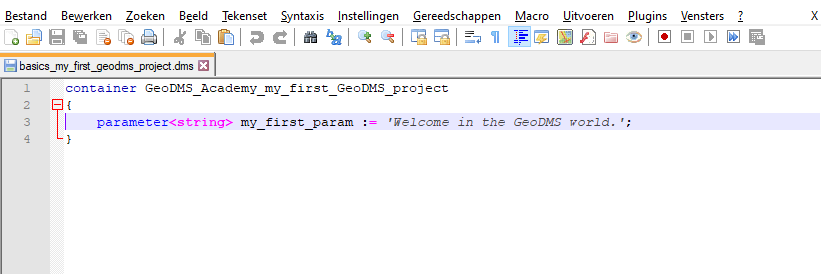
Select the item my_first_param in the tree view and press Ctrl + E (or right-click and choose Open in Editor). Notepad++ should open the configuration file with the cursor positioned on the line that defines my_first_param. If you imported the language file, the file will have syntax highlighting:
Now edit the text Welcome in the GeoDMS world to something else, save the file, and reload the configuration in the GUI (File > Reopen current Configuration). You should see your change reflected immediately. This edit-and-reload workflow is the standard way of working with GeoDMS.
step 4: configure local data folders
GeoDMS configurations often use two placeholder folders:
- %SourceDataDir%: for read-only source data files (input datasets)
- %LocalDataDir%: for intermediate and output files written by the model
These placeholders map to physical folders on your machine. You configure them under Settings > Local machine Options:
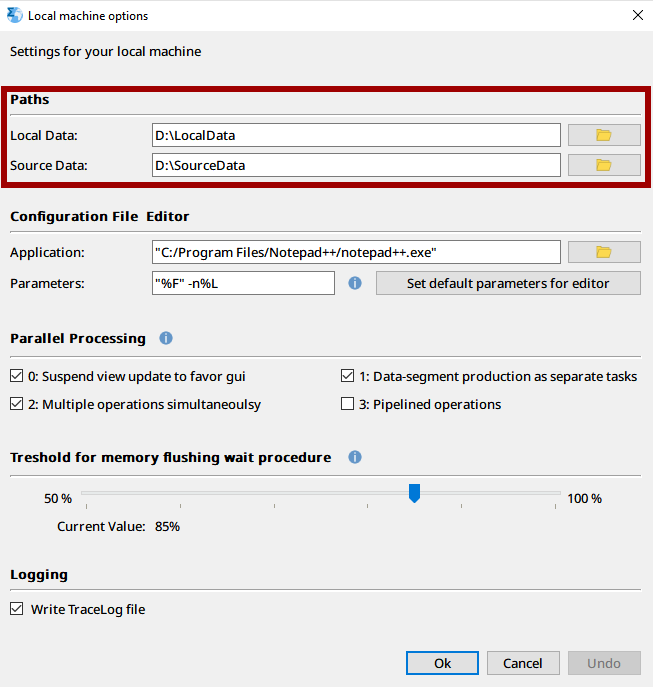
By default, the GeoDMS looks for C:/SourceData and C:/LocalData. Change these to folders that exist on your machine. We recommend setting LocalDataDir to a local drive (not a network drive) for performance.
For a broader overview of the folder structure and all available placeholders, see Folders and Placeholders.
Go to next module: Module 1, Learning the basic concepts of GeoDMS